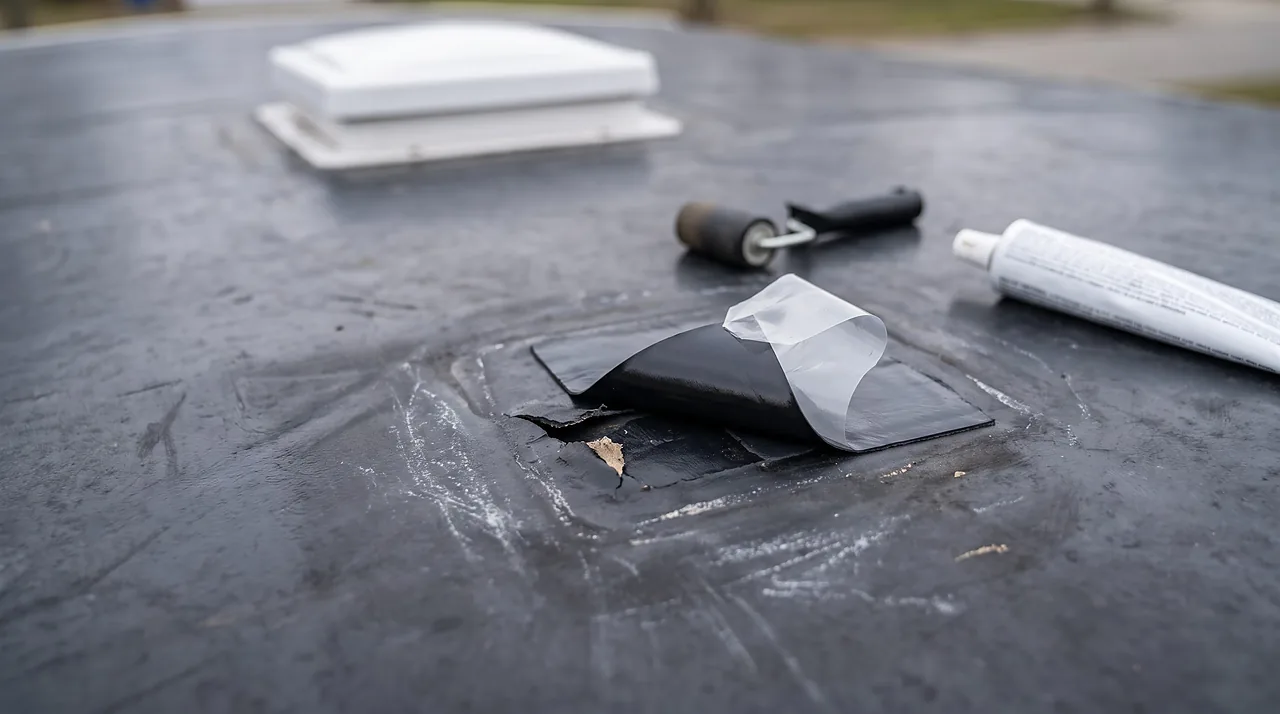
A quote to replace the whole rubber roof lands hard when the actual problem is a six-inch tear near the front vent. That gap between what a shop quotes and what the roof needs is usually a diagnosis problem, not a pricing one. Three kinds of rubber roof damage exist, and each one calls for a different fix: a tear or puncture gets patched, a chalky, sun-tired membrane gets coated, and only true delamination, the membrane separating from the wood or foam deck underneath, justifies tearing the whole thing off. The trick is knowing which of the three you're actually looking at before anyone starts talking about a full replacement.
Measuring the damage and running one simple test settles the category on its own, well before anyone needs to bring up a full replacement.
Start here: is this a tear, chalking, or delamination?
Walk the roof (weight rated for foot traffic on most EPDM decks, but check your rig's manual first) and look for exactly one of three signatures.
- A tear, puncture, or open seam. A branch scrape, a lifted vent seal, a slice from a ladder or cargo strap. The membrane itself is otherwise sound; the damage is localized and you can see clean rubber on either side of it.
- Chalking or surface oxidation. Run a bare hand across the roof. A white or gray powder transfers to your palm. The membrane is uniformly faded and dull compared to its original black or white, but it's still one continuous, flexible sheet with no separation anywhere.
- Delamination. Press down firmly on a section of roof, especially near a seam or a low spot where water pools. If the membrane feels soft, spongy, or wrinkled, or if you can see it lifting away from the substrate in a bubble that doesn't flatten back out, the bond between rubber and deck has failed. This is a different problem from the first two, and no amount of patching or coating fixes it.
Only the third one, delamination, is a substrate problem. The first two are surface problems, and surface problems are cheap to fix correctly.
Tears and punctures: patch, don't replace
A localized tear is a patch job, full stop. Dicor's EPDM repair membrane is a self-adhesive rubber strip built for exactly this: clean the damaged area with a rubber roof cleaner, cut the patch so it overlaps the damage by at least 2 inches on every side, peel the clear release liner and set the patch, then roller it flat to force out air and get full contact. Peel the second release layer and run a bead of lap sealant around the whole perimeter of the patch to seal the edge. A rubber (EPDM) roof takes this kind of patch well; a laminated TPO roof takes the same repair membrane, since the manufacturer rates it for EPDM, rubber, TPO, metal, and fiberglass alike.
One limit matters here. The manufacturer is explicit that these repair strips are not meant to be pieced together edge to edge or end to end to cover a large area, and for good reason: a seam between two patches becomes its own leak point rather than sealing one. If the damage spans more than what one continuous roll width can cover, you've likely crossed out of patch territory and into a section that needs a proper reinforced tape or a professional recover instead of a stack of stitched-together strips. Eternabond-style seam tape handles a longer straight-line seam or a roof-edge run better than a patch cut for a puncture.
A single tear, patched correctly, costs the price of a repair membrane roll plus a tube of lap sealant on top (the membrane only comes as a 6-inch by 25-foot roll, so even a small tear costs the price of a roll and a tube), and the job takes under an hour on a clean, dry roof. A six-inch tear does not need a new roof.
Chalking and UV fade: when a coating is the right call
A membrane that's uniformly chalky but still flexible and intact calls for a protective coating. This is the roof equivalent of repainting a faded deck rather than rebuilding it: the material underneath is fine, the surface has simply given up its UV protection over years of sun exposure.

Dicor's coating systems, whether the silicone-based Signature Extended Life line or the acrylic line, both call for two full coats at a coverage rate of 1 gallon per 125 square feet per coat. The manufacturer's own worked example: an 8-foot by 30-foot roof, 240 square feet, takes about 4 gallons total across both coats. Here's the same math for a bigger rig. A 32-foot fifth wheel with an 8.5-foot-wide roof works out to 272 square feet. At two coats and 125 square feet per gallon per coat, that's 272 divided by 125, times 2, or roughly 4.4 gallons, round up to 5 to leave margin for a second coat over any rough seams.
Two things trip people up on this step. First, EPDM and TPO need different primers, Dicor's cleaner/activator primer for rubber, a separate TPO-specific silicone primer for thermoplastic roofs, and skipping the correct one is the single most common reason a coating peels within a season. Second, the whole job, priming through the second coat, has to happen in one day; the coating cures too far between steps if you stretch it over a weekend. Budget a full clear, dry day and start early.
A coating restores UV resistance and stops the chalking cycle. Think of it as cosmetic and protective armor over a membrane that's already structurally sound. Coat a roof that's actually delaminating underneath and you've spent the price of 4 to 5 gallons of coating sealing a problem that keeps growing under it.
Delamination: this is the one that actually needs replacement
Delamination means the bond between the rubber membrane and the wood or foam decking beneath it has failed, usually from long-term moisture intrusion through an unmaintained seam or an old roof vent gasket that finally gave out. Water gets between layers, the adhesive lets go, and the membrane starts to separate, bubble, or feel spongy underfoot. This is a substrate failure. A patch or coating applied on top only hides the problem for a while and traps the moisture that's still working underneath.

Dicor's own coating instructions make the point directly: deteriorated or damaged substrates have to be repaired or replaced before any coating goes on. That single line is the dividing rule for this whole decision. If the substrate itself, not just the surface skin, has failed, no amount of surface product changes the outcome.
Full membrane replacement is a real job, usually a professional one: strip the old membrane, inspect and repair or replace any soft decking underneath, then install new material bonded correctly to a sound substrate. Soft decking usually starts where water got in, around vents, the front cap and roof edges, and if the wood underneath has rotted, it is cut out and replaced before any new membrane goes down. Costs vary widely by rig length and material choice, commonly running well into four figures and sometimes into five, so get more than one quote and ask specifically whether the deck itself needs repair or just the membrane on top of it. That distinction changes the price more than the brand of membrane does.
The decision, laid out
Run the test in order, top to bottom, and stop at the first signature that matches what you find. A roof can have a tear in one spot and chalking everywhere else; treat each finding on its own terms instead of assuming the worst-case fix applies to the whole roof because one section looks bad.

Branch 1: localized tear, puncture, or lifted seam
Quick test: the membrane on either side of the damage is intact and firm.
Fix: a self-adhesive repair patch with a 2-inch overlap on every side, sealed at the edge with lap sealant.
Cost: the price of a repair roll and a tube of lap sealant.
Branch 2: uniform white or gray powder, membrane still flexible
Quick test: chalk transfers to a bare hand across the whole roof.
Fix: clean the surface, apply the correct primer for the membrane type, then two coats of roof coating.
Cost: 4 to 5 gallons of coating plus primer for a mid-size roof (check current prices).
Branch 3: soft, spongy, bubbled, or wrinkled membrane
Quick test: firm hand pressure finds give, or a bubble that doesn't press flat.
Fix: deck inspection, repair of the soft substrate underneath, and full membrane replacement.
Cost: four figures and up; get multiple quotes to compare.
What if there's no damage at all
If the roof passes all three checks, no tears, no chalking, no soft spots, then there's nothing here to repair or coat. For a stain with no visible roof damage, see finding and fixing a roof leak to trace hidden water paths. Otherwise, that roof just needs the routine work: a visual check every six months and fresh sealant wherever the old bead has cracked or pulled away from a seam or fitting. It's covered separately in how to inspect and reseal an RV roof sealant job and what a full roof maintenance routine should include over a season. Most roofs that end up needing a coating or a tear-off got there because that routine check got skipped for a few years running, well before the membrane itself gave out.
Questions
What owners ask next
Can I coat over a small tear instead of patching it first?
No. A coating is a thin surface film, not a structural bridge across an open gap. Patch the tear with a proper repair membrane and lap sealant first, let it cure, then coat the whole roof if chalking is also present.
How do I know if my roof is EPDM or TPO before buying coating or patch material?
Color does not identify the membrane, since most RV EPDM roofs are white. Check the owner's manual, the build sheet or a roof-access label, or ask a dealer. EPDM feels slightly rubbery and may chalk, and TPO feels smoother and stiffer. When identifying the roof membrane, remember that the two use different primers, so confirm the type before buying anything.
Does chalking mean the roof is about to leak?
Not by itself. Chalking is UV oxidation on the surface, not a breach in the membrane. It's a sign the protective layer is depleted and a coating is due soon, but a chalky roof with no tears or soft spots is not actively leaking.
How often do I need to recoat after applying a roof coating?
There's no single fixed interval; it depends on climate, sun exposure, and the specific product, so check the coating manufacturer's current guidance for your product rather than assuming a number. In the meantime, keep up the six-month visual check and reseal any cracked lap sealant promptly.
Will a household spray rubber coating like Flex Seal work on an RV roof?
Roof membrane makers list their own compatible patches, sealants, and coatings. A general-purpose spray can hide a leak for a while, but it is not listed for EPDM or TPO by those makers. Once it is on, a proper patch or lap sealant may not bond over it, which makes the real repair harder.
Read next
Keep going on this system
Sources
What this guide is based on
- Dicor Products
- Dicor Products
- Dicor Products
- Home Depot
- Adventure RV
- Walmart
- PPL Motorhomes
Built from manufacturer manuals and published specifications. If something here does not match your appliance label or manual, the label and manual win.