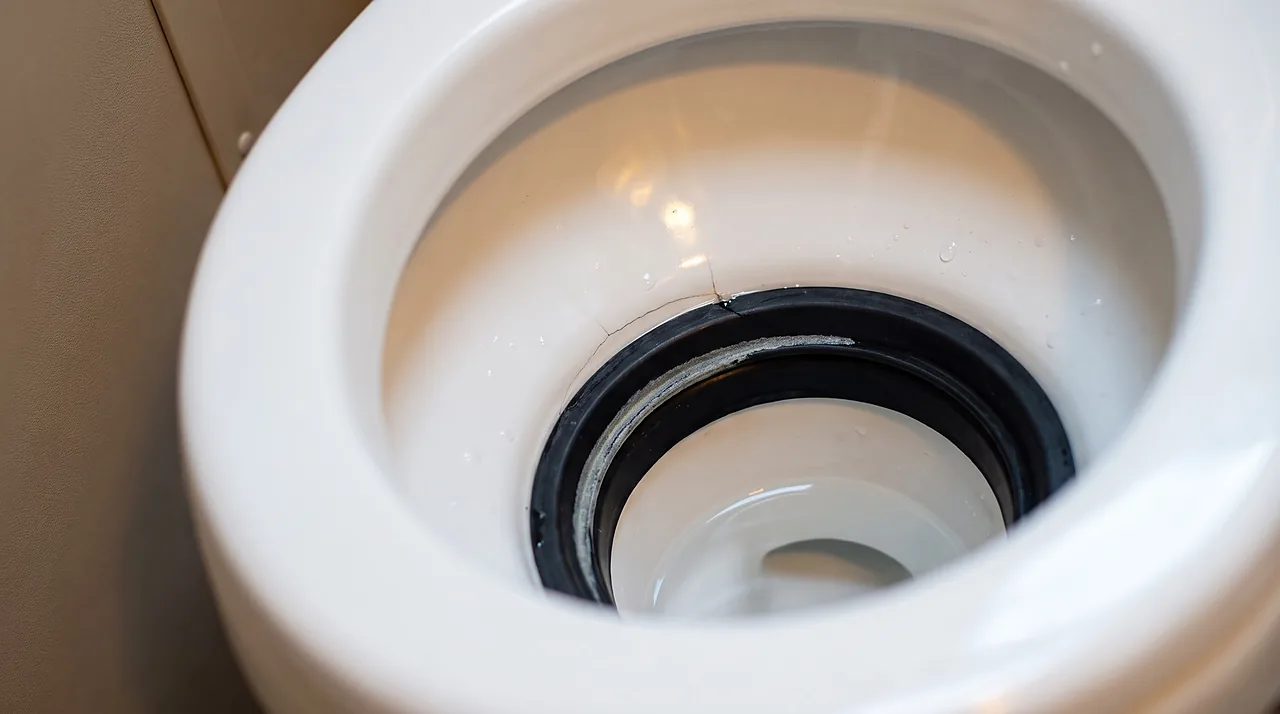
Pour a cup of water into the bowl, walk away for five minutes, and come back to a dry bowl and a whiff of the black tank. That is not a broken toilet. Most often it is a worn or dried-out seal at the base of the bowl, and a seal kit typically runs about $15-40 (prices change, check current), far less than a new toilet.
The part in question sits right where the bowl meets the holding tank, but it is not one universal part with one universal fix. On a Thetford-style cassette or gravity toilet it is a rubber blade that swings open and shut with the flush pedal, maintained with Thetford's own silicone-based seal conditioner. On a Dometic 300, 310, or 320 series toilet it is a rubber gasket that wraps the flush ball, and Dometic's own manual calls for a different routine entirely: a dedicated toilet bowl cleaner and soft brush for mineral buildup, and plain silicone spray or furniture polish if the ball is sticking from friction, a different product entirely from a conditioner. The two systems are chemically and mechanically different enough that treating them the same way is a good way to use the wrong product. Either way, the seal's only job is to hold a barrier of water in the bowl and keep tank gas from coming back up. When it dries, cracks, gets coated in mineral scale, or simply loses its shape, water leaks past it into the tank faster than gravity alone would explain, and odor has a clear path the other direction.
Confirm it is actually the seal
Before buying anything, run a quick test. Flush and let the bowl fill to its normal level, then time how fast it drops. A seal in good shape holds water for hours; a failing one drops visibly over a short wait. Wipe the flush ball or blade dry first and look at it under a flashlight. For owners who are not sure whether they have a blade or a ball, see how the common RV toilet types differ. Mineral crust, a flattened or cracked rubber edge, or a gap you can see daylight through all point to the seal, not the bowl, the pump, or the tank.

Rule out one imposter first: a slow drip from the water supply valve or a loose fitting can look like a seal problem but is not one. Check that the toilet's water shutoff isn't just weeping into the bowl before you condition or replace anything.
Condition it first, most of the time this is enough (Thetford-style blade seals)
A blade seal that looks intact but still lets water through has usually just dried out from sitting, from hard water minerals, or from cleaning products that were never meant to touch rubber. Thetford's own guidance is blunt on that last point: bleach and the acids in most household bathroom cleaners will dry out and damage the seals over time. Vinegar-based bowl cleaners and a seal-safe conditioner do the job without that risk.

The fix on a Thetford-style blade is a silicone-based toilet seal lubricant and conditioner. A squirt of household grease or a dab of Vaseline will not condition the rubber properly. Thetford's product page specifies a non-petroleum, silicone formula precisely because petroleum-based products swell and degrade the rubber over time instead of preserving it. Thetford's own page frames the schedule as a general suggestion rather than a hard rule: some suggest treating the seal at least twice a year, and more often on a rig that lives at a campsite full-time or sits in a wet climate. Run the pedal through a few full cycles after applying it so the conditioner coats the whole contact surface, not just the spot you can see.
Give it a full day, then re-run the water test. A seal that was simply dry usually holds again. If it still drains quickly after conditioning and a thorough cleaning, the rubber itself is done, and that is when you replace it rather than keep dosing it.
Recondition it first (Dometic ball-valve seals)
Dometic's own 300/310/320 Series manual treats its ball-valve seal differently than Thetford treats a blade, and it is worth following the manufacturer's actual sequence instead of reaching for the same conditioner bottle. For mineral buildup on the ball or seal, Dometic specifies cleaning with a dedicated toilet bowl cleaner and a soft brush. If the ball feels stiff or will not seat fully because of friction, the manual's troubleshooting table calls for silicone spray or furniture polish, again a different product than a Thetford-style conditioner.
Before you order a replacement seal, try what Dometic's manual actually lists as the first fix for a bowl that will not hold water when the seal is "not properly positioned" or "temporarily distorted": reconditioning. Depress the flush pedal to hold the ball open, then press the edge of the seal with a finger to work it back into the shape of the ball. Release the pedal, pour hot water into the bowl, and let it cool. If the bowl holds water once it has cooled, the seal was simply out of shape, and you have fixed it for free. Only if reconditioning and a thorough cleaning both fail does Dometic's manual point toward replacing the seal.
Replace the seal (no special tools)
Both major toilet families use a seal that presses into place, so a full teardown of the toilet is not required, but reach this step only after conditioning (Thetford) or reconditioning and cleaning (Dometic) have failed to fix it. Condition or recondition first; replace only once that has genuinely failed. Once you're at that point, the part and the steps depend on which toilet family you have.

Thetford-style blade toilet
Part: Blade seal, and often the bowl-to-blade seal together, sold as a kit.
- Shut the water supply and drain the bowl.
- Remove the old blade/seal per the model's panel access.
- Slide the new seal into its track with no adhesive.
- Reinstall the blade.
- Cycle the pedal to seat it.
Dometic 300/310/320 ball-valve toilet
Part: Flush ball seal, a rubber ring around the ball opening.
- Shut the water supply.
- Hold the flush pedal to expose the ball.
- Pull the old seal out.
- Clean the bowl rim and ball surface thoroughly.
- Install the new seal following the kit's own instructions.
- Release the pedal and cycle it a few times to seat it.
A seal kit for either family runs about 15 to 40 dollars depending on model and whether it bundles the blade or ball gasket with a bowl seal, so check the price at purchase. No wrench, no wax ring, and in most cases no removal of the toilet from the floor flange. If your model calls for pulling the toilet to reach the seal, that is unusual enough to be worth double-checking against the specific owner's manual for that unit before you start.
Why condition before you replace
The instinct when a bowl won't hold water is to order a new toilet, and plenty of owners do exactly that on the advice of a well-meaning neighbor two sites over. It is the most expensive way to solve the cheapest problem in the RV. Conditioning costs little and takes minutes. A seal kit runs about $15-40, while a whole new toilet costs far more and means pulling the unit off the flange, doing nothing that a fresh seal would not have already fixed, because the toilet itself, the bowl, the pedal mechanism, almost never fails first. Try the cheap fix, then the medium fix, and save the toilet swap for the rare case where the bowl is cracked or the mechanism itself has seized.
Water on the floor: the other toilet seal
The seal under the toilet, between its base and the floor flange, is a different part from the bowl seal. RV toilets do not use a household wax ring, they use a foam or rubber flange seal. Water or odor at the base after a flush, rather than a bowl that drains, points there, to a loose flange bolt, or to a leaking water valve behind the toilet. Replacing it means unbolting the toilet from the flange, which is covered step by step in diagnosing a leaking or sticking toilet.
When a good seal does not solve the smell
If the water test comes back clean, the seal looks fine, and the bowl holds for hours, but you still catch tank odor drifting into the bathroom, stop working on the toilet. The seal has already told you it is not the source. At that point the smell is coming from somewhere else in the waste system entirely, most often the roof vent, a dry P-trap elsewhere in the rig, or the tank contents themselves needing a different treatment approach, and that path is covered separately in the tank odor troubleshooting guide. Chasing the toilet seal a second or third time once it has already passed the water test just wastes conditioner.
It also helps to know what you are dumping into in the first place. A tank that is run dry between dumps, gets flushed with too little water, or never gets the right volume of rinse water tends to build the kind of residue that misreads sensors and holds smell even with a perfect seal up top, and that whole side of the system, from dump timing to rinse volume, is broken down in the black tank guide.
Keep it from happening again
- Add the seal to a twice-a-year routine, not a when-it-fails routine. Spring dewinterizing and fall winterizing are natural, memorable checkpoints.
- Switch to a vinegar-based or seal-safe bowl cleaner and drop the bleach-based ones.
- Leave a few inches of water sitting in the bowl between uses, especially during storage, so the seal never sits bone dry for weeks at a stretch.
- If the rig sits unused for more than a few weeks, check the bowl water level when you return rather than assuming it is fine.
Frequently asked questions
Can I use petroleum jelly instead of a real seal conditioner?
Skip it for routine conditioning. Thetford specifically formulates its seal conditioner as non-petroleum silicone because petroleum-based products swell and break down rubber over repeated use. A thin film of silicone grease is fine as a one-time assembly aid during a seal swap, but it is not a substitute for the conditioner as an ongoing maintenance product.
How do I tell a worn-out seal from one that's just dirty or misshapen?
Look at the rubber itself. A flattened edge, a visible crack, or a gap you can see daylight through means the material is actually done, and conditioning or reconditioning will not bring it back. A seal that still looks intact but leaks anyway is usually just dry, scaled with minerals, or, on a Dometic ball valve, temporarily out of shape, all of which clean up, condition, or recondition rather than replace. Seals are wear parts that normally last years; one failing well before that points to bleach damage, hard water, or dry storage rather than a defective part.
Does the finger-press reconditioning trick work on a Thetford blade seal too?
No. Reconditioning by hand-shaping is specific to Dometic's ball-and-seal design, where the rubber ring can be pressed back into the shape of the ball it wraps. A Thetford blade seal is a flat gasket rather than a ring molded around a moving ball, so it does not hold shape memory the same way. If a Thetford blade still leaks after a thorough cleaning and conditioning, replacement is the next step.
How do I know which seal kit fits my toilet?
The seal is specific to the toilet brand and model, not a universal size. Find the model on the label on the toilet (often at the back or underneath) or in the owner's packet and match the kit to it. For the floor seal, the same model number decides the flange seal.
Is this the same fix for a motorhome, fifth wheel, and travel trailer?
Yes. The toilet hardware is identical across trailer, fifth wheel, and motorhome installs; only the access panel around it differs slightly by floor plan.
Read next
Keep going on this system
Sources
What this guide is based on
- Thetford
- Dometic - 300/310/320 Series Installation and Operation Manual
Built from manufacturer manuals and published specifications. If something here does not match your appliance label or manual, the label and manual win.