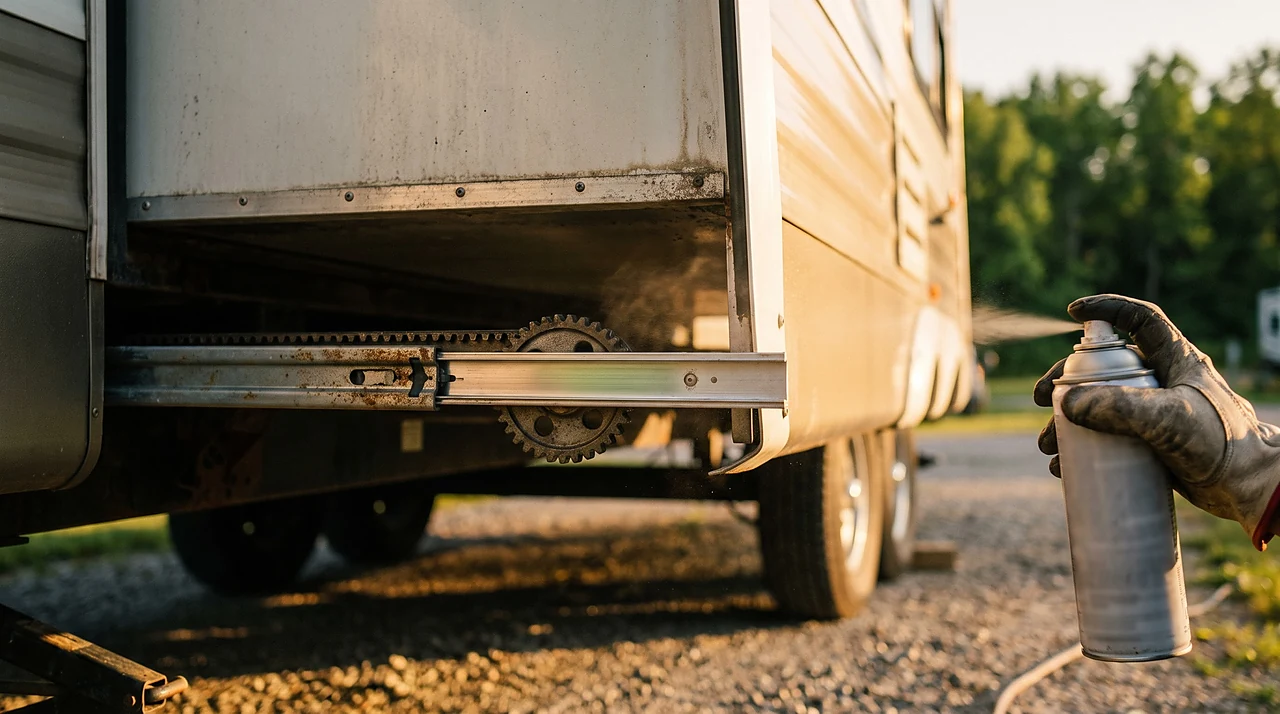
A slide-out that stops halfway, sitting open a few inches wider than the wall around it, usually points to something simple: a limit switch tripped, a battery sagged, or a rail needs the kind of attention a five-minute lube job would have prevented. A room that does travel fully in and out but comes to rest crooked or sitting proud on one side is a different matter, one of alignment rather than power, and bringing an uneven slide back into square is its own adjustment. Before anyone reaches for a pry bar or leans a shoulder into the wall, it helps to know which of the three common slide-out families is installed underneath, because the safe way to move it by hand is different for each one, and every one of them has a documented override.
Two things cause most slide-out trouble that never turns into a real repair bill: dry, dirty rails, and a weak battery feeding an actuator that draws more current than it can supply. Fix those two and the manual overrides become rarely needed backups.
Know your mechanism before you touch anything
Lippert, one of the largest makers of slide-out hardware on production trailers and fifth wheels, builds three distinct systems, and they do not share lubrication points, override tools, or failure habits.

- Rack-and-pinion / through-frame (cable and gear) systems. A motor turns a gearbox that drives a toothed rack or a cable drum mounted along the chassis rail. This is the most common setup on mid-size trailers and it is also the one Lippert names as needing more periodic maintenance than the alternatives, because exposed gear teeth and open rails collect road grit.
- Hydraulic systems. A pump pushes fluid to a ram at each end of the room. Fewer exposed moving parts sit outside the frame, so Lippert's own guidance treats these as lower-maintenance, though the pump, hoses, and seals still deserve a visual check each season.
- In-wall (Schwintek) systems. Two small motors, one on each side, ride on a rack built into the wall cavity itself, above floor level. There is no exposed rail to grease, and a lubrication decision here is different enough that Lippert publishes a standalone piece of guidance just on whether these need lube at all.
If the make and model of the mechanism is not obvious from underneath the trailer, the slide-out room's edge trim is a faster clue: an in-wall system has visible wiper seals running vertically at both side corners with a motor housing tucked behind them, while a through-frame system shows its rails and gearbox below the floor line, outside the wall.
The lubrication schedule that actually protects the mechanism
The single most common maintenance mistake is reaching for whatever spray can is already in the toolbox. A general-purpose penetrating oil is designed for loosening a rusted bolt, and it leaves a thin, wet film when left exposed on a rail that gets dragged through campground dust every time the room moves. That film grabs grit and holds onto it, and within a season or two the rail runs rougher than it did with no lubricant at all.

What the rails and exposed gear teeth actually want is a dry lubricant made for the job: it goes on wet, then flashes off to a dry, waxy film that sheds dirt rather than collecting it, while still protecting bare metal from rust and corrosion. A rubber wiper seal has a different job entirely: it needs a water-based rubber conditioner to keep it pliable, and an oil-based product left on the compound can cause it to swell or dry out over time.
Each mechanism has its own lubrication points, product, and interval:
Rack-and-pinion / through-frame
What to lubricate: the exposed rail surface, the gear teeth, and the cable if the system uses one.
Product type: a dry lubricant/protectant spray.
How often: periodically as part of seasonal upkeep, and again before any long trip.
Hydraulic
What to lubricate: the ram rod (light wipe only) and the pivot pins.
Product type: a dry lubricant/protectant spray, applied as a light film.
How often: roughly seasonally, alongside a fluid and hose check.
In-wall (Schwintek)
What to lubricate: nothing on the internal gear track as routine maintenance.
Product type: none required by default.
How often: only if the manufacturer's own inspection flags dry contact points.
Rubber wiper and bulb seals (any system)
What to lubricate: the seal itself.
Product type: a water-based rubber seal conditioner; keep petroleum oil off the seal entirely.
How often: periodically, wiping clean first.
Lippert's own guidance describes this cadence loosely, as something to do "from time to time," with no fixed calendar attached, so treat the intervals above as a reasonable owner's rule of thumb tied to the seasonal routine below; the manufacturer does not mandate a strict schedule. Before applying anything, wipe the rail down with a dry cloth to knock off loose grit, since spraying lubricant over sand and road film just turns it into a grinding paste. Actuate the room a full cycle after lubricating so the film works into the whole travel length, not just the visible section.
When the slide won't move, work through this before you call for help
A room that stalls partway is almost always one of a short list of causes, in rough order of how often each one shows up:
- Low house battery voltage. The slide motor draws a heavy momentary load, and a weak or partly discharged battery often cannot supply it, even though the lights and water pump still work fine on that same weak battery. Check state of charge before assuming a mechanical fault; a quick primer on how the house battery bank, converter, and load actually interact lives at the basics of a trailer's 12-volt electrical system.
- A tripped circuit breaker or blown fuse feeding the slide motor. Check the breaker panel first; it is the fastest thing to rule out.
- Something physically in the track. A dropped tie-down strap, a stray toy, or built-up debris on the rail can stall a through-frame system well before the motor itself is at fault.
- A tripped limit switch from an out-of-square room if the trailer is not level side to side. An unlevel trailer puts uneven load on the mechanism and can trip a safety cutout; getting the rig properly leveled first, using the guidance in a full walkthrough of setting up jacks and stabilizers correctly, resolves a surprising share of stuck-slide calls before any override is needed.
None of those four require forcing the room by hand, and forcing a slide that has stalled for an electrical or a level-related reason is how a battery or leveling fix turns into a gearbox or motor repair. Rocking a stuck room with a pry bar, or leaning weight into it from inside, can shear a gear tooth or bend a rail that would otherwise have moved fine once the battery was charged or the trailer was leveled. A dedicated breakdown of every stall cause and fix, including sensor faults specific to each mechanism, is covered step by step in the troubleshooting guide for a slide that has stopped responding.
The manual override for each system, and when it is actually safe to use it
Every slide-out mechanism sold today ships with a documented manual override, built by the manufacturer for exactly this situation: a room stuck open or shut with no power, at a campsite, needing to travel. None of them are designed to be forced without following the sequence.

Through-frame rack-and-pinion or cable systems
Locate the crank extension near the slide motor. On hardware with a removable pin-handle crank, it sits outside the chassis rail, underneath the trailer; on hardware using a hex-head fitting for a socket and ratchet, it sits at the top of the actuator inside the chassis main frame. Disconnect the trailer's battery first; cranking the mechanism by hand while the motor is still wired in can push current backward through the motor and damage it, and it also voids warranty coverage on the actuator. With the battery disconnected, turn the crank in the direction marked on the unit or in the manual to retract or extend the room. The gearbox is built to be turned this way without disengaging the motor, so there is no need to pull anything apart first on this system. Use extreme caution as the room nears full travel in either direction: continuing to rotate the override past full extension or full retraction can drive the mechanism beyond its limits and strip the gears, and the manufacturer's own manual is explicit that this kind of override misuse voids the Limited Warranty, so stop cranking as soon as the room reaches its normal travel limit.
Hydraulic systems
A hydraulic ram has its own manual release valve at the pump, which lets fluid bypass so the ram can be pushed by hand; the exact valve location and turn count are specific to the pump manufacturer and are printed on a placard near the pump or in the owner's packet that came with the trailer, so check that placard before improvising. As with the crank systems, disconnect the battery first so a live pump motor cannot be back-driven while fluid is bypassed.
In-wall (Schwintek) systems
There is no crank on this system, because the rack lives inside the wall, above the floor line. The override here means disengaging each wall motor's gear from its rack, while the motor itself stays mounted in place the whole time: at each side of the room, take out the retaining screw near the top corner of the wiper seal, pull the seal back slightly, then use a flat screwdriver to pry the motor upward just far enough to lift its gear clear of the rack. With the motor held in that raised, disengaged position, replace the retaining screw before letting go of the screwdriver, since that screw is what holds the gear clear of the rack; skip it and the gear drops straight back down and re-engages. Once both motors are disengaged and re-secured in the raised position, the room can be pushed in or pulled out by hand, working a little at a time and switching sides so the travel stays even; forcing one side in faster than the other is what binds this style of track. If the room resists and will not budge evenly, easing pressure and rocking it gently a couple of times relieves the bind far more reliably than continued force. Once the room is where it needs to be for travel, remove the retaining screws again to let both motors' gears drop back into the rack, secure the room with the built-in slide lock or a stable brace before moving the trailer, and confirm both motors are seated back in their normal running position before towing. Follow the override card or manual for your exact model; the steps above are the common in-wall sequence, and details vary between model years.
Whichever system is underneath, if the override does not move the room within a few careful attempts, or if something audibly cracks, grinds, or binds hard partway through, stop. That is the line between a maintenance job and a mechanical failure that needs a technician with the room still under warranty coverage, and pushing past it is the single fastest way to turn a lube-and-crank afternoon into a full gearbox replacement.
Before every retract: clear the roof of the room
Leaves, branches, pooled water and snow on top of the slide room ride in with it and get pushed against the seals or dumped inside. Sweep or brush the top before retracting, and if the rig has slide toppers, check they are not sagging with water. Then look along the slide seals for anything caught before the room moves.
Building the slide into a seasonal routine
Slide-out care fits naturally alongside the rest of a trailer's seasonal work, as one more line on the same walkaround. A quick rail wipe-down and lube check pairs well with the same walkaround used for tires, roof seals, and battery terminals, and folding it into a full seasonal maintenance routine means it never gets forgotten until something already feels wrong. Addressing a slide that grinds or squeaks during these seasonal checks prevents minor friction from turning into gear or track damage. Awning care follows the same dry-lube-and-inspect rhythm on the arm hardware: clean the hardware, lube it, and ease any bind gently with steady, patient pressure, a routine covered step by step in keeping the awning arms and fabric in working order.
Questions
What owners ask next
Is it safe to drive with the slide-out partially extended if it will not fully retract?
No. Even a few inches of extension can catch a low bridge, a gas station canopy, or a tree branch, and it puts unsupported load on the seals and rail. Use the documented manual override for the mechanism to fully retract or fully secure the room before towing.
Can WD-40 be used in an emergency if nothing else is on hand?
Better not; it is a penetrating oil that leaves a wet film that collects grit, which is the opposite of what a rail needs. If a stuck room needs help, check the battery and the track for debris first; if WD-40 has already gone on, wipe the rail clean and apply a dry lubricant.
Why does the slide work fine on shore power but stall on battery alone?
That pattern almost always means the house battery is too weak to supply the motor's peak draw once it is on battery only. The converter tops off the battery on shore power, which masks a weak bank that would otherwise show its limits.
Does a slide-out topper affect maintenance on the mechanism itself?
Not directly. A topper protects the roof seam above the room from water and debris, but it has no bearing on the rail, gearbox, or motor underneath. Both deserve their own separate inspection.
Should the slides stay in or out when the RV is parked?
Out is fine while camping and gives the mechanism no extra wear. For storage, bring them in so the seals, roof of the room and the mechanism are not exposed to weather, snow load and pests, unless the manufacturer says otherwise. Always retract fully before towing.
Read next
Keep going on this system
Sources
What this guide is based on
- Lippert Components
- Camco
- Lippert Components Customer Care Center
- Great American RV Customer Support
- Lippert Components
Built from manufacturer manuals and published specifications. If something here does not match your appliance label or manual, the label and manual win.