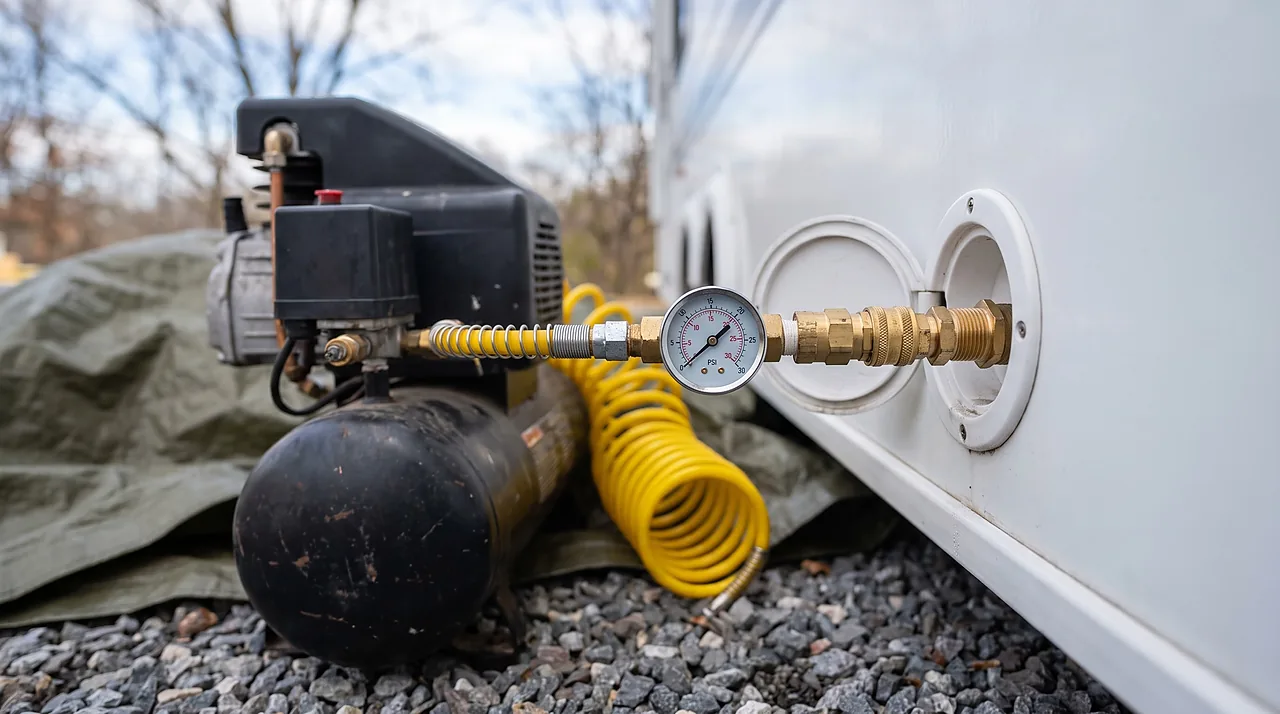
Your shop compressor is sitting at 120 psi and the RV is sitting fifteen feet away with an empty water heater and a city water inlet that has never seen anything stronger than campground pressure. That gap is the entire problem. Guess at the setting and crack the valve, and you're really testing how much pressure a plastic fitting can absorb before it lets go, usually at the worst possible joint, usually not until January when nobody's looking.
The method itself is simple once the ceiling is fixed: a regulator dialed down to 35 to 40 psi maximum, fed into the system in a specific order, with every low point in the plumbing checked before you call it done. Skip the regulator and you're gambling with a fitting. Skip the order, or skip a low point, and the water you missed sits in a dead-end section of pipe all winter and splits it quietly. Nothing shows the damage until you turn the pump on in spring and the belly pan fills with water from the crack.
Set the ceiling before you touch a valve
Do this first, before the compressor is even connected to the RV: put an inline regulator between the compressor and the blow-out fitting and set it no higher than 35 to 40 psi. The compressor's tank gauge only tells you what's stored inside the tank. The regulator's downstream gauge is the only number that matters here, since it reflects what's actually arriving at the plumbing.

That 35-40 ceiling is a deliberate buffer well under the outer limit of what any given fitting will tolerate, and it's worth understanding why it's set lower than numbers you'll see elsewhere. A typical brass blow-out adapter's own instructions describe a 30 to 50 psi working range for winterizing and draw a hard line at 60 psi, warning that going past it can damage pipes. Meanwhile, the regulator most owners already run on a hose bib to protect the same plumbing during the camping season is factory-set to knock incoming water pressure down to 40 to 50 psi in the first place. Staying at 35 to 40 for air keeps you comfortably under both of those numbers instead of riding right up against either one. It also accounts for the fact that air, unlike water, doesn't compress the way a liquid does: a pressure spike from a kinked hose or a stuck valve reads instantly at every joint downstream, not gradually.
The pressure ceiling, step by step
Step 0, set the ceiling before anything else connects: dial the inline regulator down to 35-40 psi and read that number on the regulator's own downstream gauge. That gauge, not the compressor's, is the one that governs the whole job.
- Compressor tank gauge (often 90-150 psi): this is storage pressure inside the tank. It has nothing to do with what actually reaches the RV's lines, so it's never the number you dial to.
- Inline regulator, set for the job: this is what actually reaches the RV's plumbing, capped at 35-40 psi max and read on the regulator's own downstream gauge.
- Blow-out adapter's stated working range: the fitting's own manufacturer instructions describe a 30-50 psi typical working range, with 60 psi as the hard ceiling before pipe damage becomes a risk.
- Normal RV water pressure regulator: the regulator most owners already run for camping-season water knocks incoming pressure down to 40-50 psi, so setting 35-40 psi for air keeps you comfortably under even that everyday number.
If you don't own an adjustable regulator, a fixed 40-50 psi water pressure regulator (the same kind used on the city water hookup) plumbed between the compressor and the blow-out fitting will get you close enough, though a dedicated air regulator with its own gauge gives you a cleaner read. Either way, confirm the number before the first faucet opens, since waiting until you hear something hiss means the pressure was already wrong.
Gear that actually belongs in the kit
- A brass or plastic blow-out plug that threads into the city water inlet, most with a Schrader valve so a standard tire chuck locks onto it
- An inline air regulator with a visible downstream gauge, or a fixed 40-50 psi water regulator as a substitute
- An oil-less air compressor if you have a choice; an oiled compressor can push a fine mist of oil into potable lines over repeated use. No special compressor is needed; a small pancake or portable compressor is enough, because the job runs at low pressure in short bursts; a small tank simply needs pauses to refill between faucets, so let it catch up rather than raising the pressure.
- A basic flashlight and something to lie on, since the low point drains sit underneath the trailer, well below eye level
- RV antifreeze on hand regardless, because air clears water, it doesn't leave protective fluid behind (see which RV antifreeze to buy)
That last point deserves its own sentence: the blowout method and antifreeze aren't rivals, they're a sequence. Air does the heavy lifting of emptying the lines so the antifreeze you add afterward doesn't get diluted to uselessness by standing water. If you're still deciding whether your rig is even a good candidate for the air-first approach versus a straight antifreeze fill, that decision belongs in the full RV winterizing walkthrough, which covers when each method makes more sense for a given plumbing layout.
Bypass the water heater before you connect anything
Do this before the compressor ever gets attached. Close off the water heater at its bypass valve so no air, and later no antifreeze, has any path into the tank itself. A common 6-gallon Suburban tank and a common 10-gallon Suburban tank are both built with a replaceable anode rod that doubles as the tank's own drain plug. Forcing that tank through a full winterizing cycle for no reason wastes six to ten gallons of antifreeze you'd otherwise need to fill it, protects nothing the empty, drained tank didn't already have covered, and adds a step that can trap air pressure against a fitting that was never meant to see it repeatedly. Drain the tank completely at the anode plug, confirm the bypass valve is actually diverting flow around the heater and not just partially open, and only then move to the compressor. The exact valve layout varies by rig, and getting the routing wrong is the most common way owners think they've bypassed the tank when they haven't, so it's worth confirming against how the bypass valve is supposed to route around the tank before you trust it.

The order that actually clears every line
Work from the fitting closest to the compressor outward, and don't skip a fixture because it seems minor. A mid-size travel trailer with a kitchen, one bath, an outdoor shower, and a washer prep has enough separate faucets, valves, and drain points that skipping even one leaves a place for a missed pocket of water to sit.
- Drain both fresh and grey/black tanks fully and open the low point drain lines under the trailer before connecting air, so gravity does the first pass of the work for free.
- Screw the blow-out plug into the city water inlet, with the regulator already dialed to 35-40 psi and the fresh tank's own pump switched off.
- Open the kitchen faucet, hot side only, and hold it until air spits clear with no more water, then close it and repeat on the cold side.
- Move to the bathroom sink, same hot-then-cold sequence.
- Clear the shower or tub valve, both hot and cold.
- Flush the toilet and hold the pedal or lever until it runs dry, since the valve seal there traps a surprising amount of standing water.
- Open the outdoor shower or exterior wash-down spray if the rig has one; it's the fixture most owners forget because it's out of sight during a walkthrough.
- Open the washer or ice-maker prep valve if either is plumbed in, even if the appliance itself isn't installed.
- Recheck the low point drains a second time now that air has pushed residual water down to them.
- Crack any accumulator tank or water heater bypass drain point briefly to confirm no trapped pocket remains.
- Once air runs clear at every fixture, disconnect the compressor, pour antifreeze into each drain, the toilet bowl and every P-trap, and leave the low-point drains and faucets open for storage so nothing stays trapped under pressure.
The sequence matters because air takes the path of least resistance. Skip ahead to the shower before the kitchen line is fully cleared and you can push water from one section into another and leave the system only partly cleared, which shows up later as a line that tested dry during winterizing and still splits.
Where the water you missed actually sits
Every RV has a handful of spots lower than the rest of the plumbing run, and those are exactly where residual water collects once you've stopped blowing air. A P-trap under a sink holds water by design, that's what makes it a trap, and it needs antifreeze poured directly into the drain afterward, not just an air pass. Low point drain lines under the floor are the intended exit for gravity-fed water, but a kinked or partially frozen line can trap a pocket right at the valve itself even after you think it ran dry. An ice-maker or washer supply line that dead-ends at a capped fitting has nowhere for air to push the water except back the way it came, so it often needs its own dedicated pass with the cap removed. An outdoor shower head, if the rig has one, sits at the end of a long run of exposed line that's often routed along the underbelly closer to the cold than anything inside the cabin.

None of these need a special tool. Check each one physically, since clear air at the kitchen faucet does not confirm the whole system is clear. A flashlight and a few minutes on your back under the trailer catches what a rushed walkthrough misses, and that's the difference between a clean spring dewinterizing and a cracked fitting discovered the hard way.
The black and grey tank side isn't optional either
Blowing out the fresh water lines does nothing for the tanks themselves or the toilet's own water seal, and both need separate attention during the same session. The toilet's flush valve holds water against its seal even after the bowl looks empty, and the black tank's own low point and macerator lines, if the rig has one, need the same air-and-antifreeze treatment as the fresh side. That part of the job differs enough in its details, including tank sensors, flush valve seals, and antifreeze quantities, that it deserves its own treatment. It gets a full walkthrough in winterizing the holding tanks and toilet rather than a quick summary here.
How much antifreeze, and when air alone is enough
Air clears the lines but leaves nothing behind to protect a joint through a hard freeze the way a liquid antifreeze does. That's why most owners still pour RV antifreeze into every drain, trap, and the toilet bowl after the blowout is done, even though the lines themselves are already dry. How much to use per drain and per trap, and how that scales for a longer or shorter storage stretch, is its own calculation with its own numbers, covered fully in the antifreeze dosage guide. Treat the two articles as a pair covering the same job: getting the lines empty and the pressure safe here, then dosing the antifreeze correctly once the air work is finished.
Frequently asked questions
Can I just run my shop compressor at its normal pressure for a few seconds instead of buying a regulator?
No. A momentary burst at 90 to 150 psi can blow a fitting or split a line just as easily as a sustained one, and there's no way to guarantee "a few seconds" stays under control once the valve is open. A cheap inline regulator costs less than one replacement fitting and takes the guesswork out entirely.
Does the blowout method replace antifreeze completely?
No. Water expands by roughly a tenth of its volume as it freezes, and that expansion is what splits a fitting or a trap. Even a few tablespoons of water left in a P-trap can crack it overnight in freezing weather if no antifreeze followed the air pass. That's why most owners still add antifreeze to every drain, trap, and the toilet once the lines have been cleared.
My trailer doesn't have a water heater bypass valve. What now?
Without a bypass kit, the tank has to be drained and either filled with antifreeze or left drained and closed off with the anode plug removed and stored for winter. A heater without a bypass gives air or antifreeze no way to stay out of the tank's own fittings during the process, so the drain-and-store approach is a different procedure with its own steps, covered in the water heater bypass guide linked above.
How do I know a line is actually empty and not just quiet?
Listen for the sound changing from a wet sputter to a steady hiss of dry air, and watch the faucet outlet directly. A line that's truly clear pushes only air with no visible droplets for several seconds straight. If it sputters on and off, there's still a pocket somewhere upstream and it needs another pass.
Read next
Keep going on this system
Sources
What this guide is based on
- Installation Instruction for RV Winterize Blowout Adapter (manufacturer product instructions)
- Valterra, "Water Regulator, Brass, Lead-Free" product page
- Suburban RV (Airxcel), 6 Gallon and 10 Gallon Advantage Tank Water Heater product pages
Built from manufacturer manuals and published specifications. If something here does not match your appliance label or manual, the label and manual win.